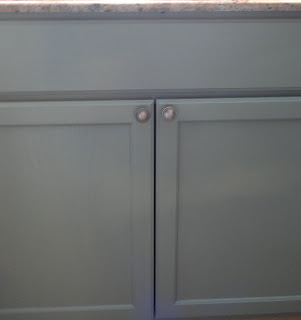
Whew! The cabinets are the appropriate color, (almost) all the hardware is on, the vent hood is up, and with a bit of luck, our back splash may be up by the end of the day. Fingers crossed!
I also want to say that I am in no way being paid, compensated or anything else for this. These are my unvarnished (heehee) opinions of Rustoleum Cabinet Transformations and nothing else. You should be able to find the kit in the paint department of your local hardware store...it comes in 2 sizes and looks like this:
This kit is really and truly meant for cabinets that have previously been painted, stained, whatever. But, you can use it on unfinished wooden cabinets, which is what we did. These are the basic ingredients...you can make it a 3 step process or a 4 step process, depending upon the look you want.
The two main selling points for me are: no sanding and it's tintable to quite a few different colors. I've even heard that you can get it color matched to just about any color you want, too. We chose Meadow:
So, I set up a little "paint-booth" with the idea of keeping any stray dog hairs at bay and started deglossing. You'll know that your surface is properly deglossed when one of two things happen: painted/stained wood will look dull and bare wood will look a bit bleached, like this:
One small problem with deglossing bare wood, though. It raised up a bunch of splinters, so I wound up having to go back with a green scrub pad to get them off, then wipe them down with a lint free cloth. So, I probably could have used my little palm sander and been done sooner, but oh well.
Then, 2 coats of color. You're supposed to allow for 2 hours between each coat, but I cheated and it still came out fine. Not that I'm recommending you do that.
We tried out the decorative glaze on a scrap piece of wood and just didn't like the results. To me, it made the wood grain stand out a bit more and kind of gave the green a muddy appearance.
So, we just put the protective coat on and hung them up. Well, really, I put the protective coat on and my husband put on a second out of the whole fear of kids and dogs thing, but really, you only need one coat. Then, we installed the hardare, which we got from Home Depot in "contractor packs." I can't remember what we paid, but the knobs were about a buck each and the pulls were about a buck fifty each, so it was pretty economical.
And we got the vent hood up, too. So nice to have one again.
We're currently working on the back splash, then moving on to the floor. Stay tuned for the big reveal on January 31st!
In summary, though, I would absolutely recommend Rustoleum Cabinet Transformations. If you have any type of DIY experience, using the kit is a breeze. And if you don't, the instructions are so intuitive ans simple that it would still be pretty easy. My biggest gripe at the end of the day is that quite a bit of the wood grain still shows through on some of our upper cabinets. However, that is just me knit-picking. I'd like a little more opacity, but the cabinets really do look fantastic.
Oh, and if you'd like to read another review that I thought was spot-on, check out Centsational Girl's review here.


What a great product review! We're looking to install the same cabinets that you did. My husband prefers natural wood and I want color in my kitchen--this sounds like the perfect alternative!
ReplyDeleteThanks, Ellie! Let me know what color you decide on, please :)
ReplyDeleteWow. What a project. The end result looks great.Double TV Bed in Brown
ReplyDelete