Most of our furniture makeover projects are either done for free or on the cheap. I get a lot of free paint...Ace Hardware periodically gives away a quart of flat paint per household on specified Saturdays. In any color you choose.
You'll need this form here if you want one. If you don't Facebook, check your junk mail inserts for the Ace ad. Should be one in there.
I love their Clark and Kensington paint. We recently painted a dresser in it and the coverage was phenomenal. They have a shade called Cannonball, which is the absolute most perfect charcoal-y black. One word of caution, I tend not to use this paint is I'm planning on distressing a piece. For that, I'll use something that has a thinner formulation. If you're just getting started with furniture painting, I'd suggest getting a great soft black, grey, and white first. Then maybe filling in with a teal and a red- those 5 colors are super versatile for mixing at home, too.
I'll have pictures of the aforementioned dresser soon, too. But, posts will be few and far between for a bit because.......we're moving!!!!! In two months! My wonderful husband is being discharged from the Armed Forces and let's just say they aren't big on giving you a ton of time to prepare ;)
We'll be stopping off in Texas to regroup and reorganize while we scout for houses. And then we'll be packing up again! This is a wonderful time for our family, but we are going to miss terribly the friends who have become family over the past several years.
Happy Monday and enjoy the free paint this Saturday!
Monday, July 30, 2012
Monday, July 23, 2012
Dresser Makeover 2x Ideas
We just scored 2 dressers off of Craigslist; one was 15 bucks and the other was 30. ONe will go in the kids' room and one will wind up in ours. I have a few ideas of what to do with them, but here's what came from perusing Pinterest for inspiration:
Love the lacquered kelley green, though I'd have to completely redecorate if I wanted it in my house ;)

A more subtle green:

Ombre- really "in" right now and just kiddish enough without being too babyish...this might be my front runner:

Or something like this....when the kids outgrow the cutesy, it can just be painted over:

The wallpapered look would be quick and cheap, but I'd feel guilty for papering over solid wood. I'd do it laminate in an instant, though!

I love the white with natural wood. Might be going with something like this for our dresser:

Or this:

Fun numbering:

But, I also love my brownish greys:


It would probably be helpful if my tastes weren't so eclectic! We'll be prettying up our new dressers this next week and I'll show you how they turn out...
A more subtle green:
Ombre- really "in" right now and just kiddish enough without being too babyish...this might be my front runner:
Or something like this....when the kids outgrow the cutesy, it can just be painted over:
The wallpapered look would be quick and cheap, but I'd feel guilty for papering over solid wood. I'd do it laminate in an instant, though!
I love the white with natural wood. Might be going with something like this for our dresser:
Or this:
Fun numbering:
But, I also love my brownish greys:
It would probably be helpful if my tastes weren't so eclectic! We'll be prettying up our new dressers this next week and I'll show you how they turn out...
Friday, July 20, 2012
The Easiest Way to Paint Baseboards and Trim
I can't believe that in over 3 years of DIY restoration on this house it took us this long to figure this little trick out...SPRAY PAINT.
 I am truly a little dense sometimes. All these years, we've been taping and hand painting. It's messy and nervewracking...white paint and taupe carpet do not mix. But this stuff is awesome. Defintely fork over the extra dough for the cans with the cool trigger. It sprays in kind of a diamond pattern and coats like airbrushed perfection. Even I can use this stuff with good results and I suck at spray painting (which probably kept me out of a lot of trouble as a kid).
You really can't tell that it's spray paint:
I am truly a little dense sometimes. All these years, we've been taping and hand painting. It's messy and nervewracking...white paint and taupe carpet do not mix. But this stuff is awesome. Defintely fork over the extra dough for the cans with the cool trigger. It sprays in kind of a diamond pattern and coats like airbrushed perfection. Even I can use this stuff with good results and I suck at spray painting (which probably kept me out of a lot of trouble as a kid).
You really can't tell that it's spray paint:
 Sorry for the pink-y tone...didn't have time to white balance the pic.
We did 2 coats, allowing about 3o mins between coats and letting the final coat cure in the sun for about 4 hours. Yes, it is a bit more expensive than hand painting, but not much when you factor in the cost of painter's tape and the fact that time = money.
Obviously, this only works if you're installing new...but, wow, it looks awesome and is such a time saver. It's definitely worth wearing a respirator, too...the fumes are wicked. Happy painting!
Sorry for the pink-y tone...didn't have time to white balance the pic.
We did 2 coats, allowing about 3o mins between coats and letting the final coat cure in the sun for about 4 hours. Yes, it is a bit more expensive than hand painting, but not much when you factor in the cost of painter's tape and the fact that time = money.
Obviously, this only works if you're installing new...but, wow, it looks awesome and is such a time saver. It's definitely worth wearing a respirator, too...the fumes are wicked. Happy painting!


Monday, July 16, 2012
Refinishing Our Hardwood Floors
Busy weekend....we completely refinished the hardwoods in our living room! Well, we kind of cheated a bit. You see, our hardwoods were on there last legs. We were this close to covering them in laminate and calling it done. But we wanted to try one more time to see if we could get them presentable. I think you're always better off leaving original hardwoods when you can; it's just something buyers seem to look for.
I'm not saying that this is the right way to do this, it was simply a last ditch effort that payed of surprisingly well. YMMV.
You can tell that hardwoods were in pretty miserable shape:

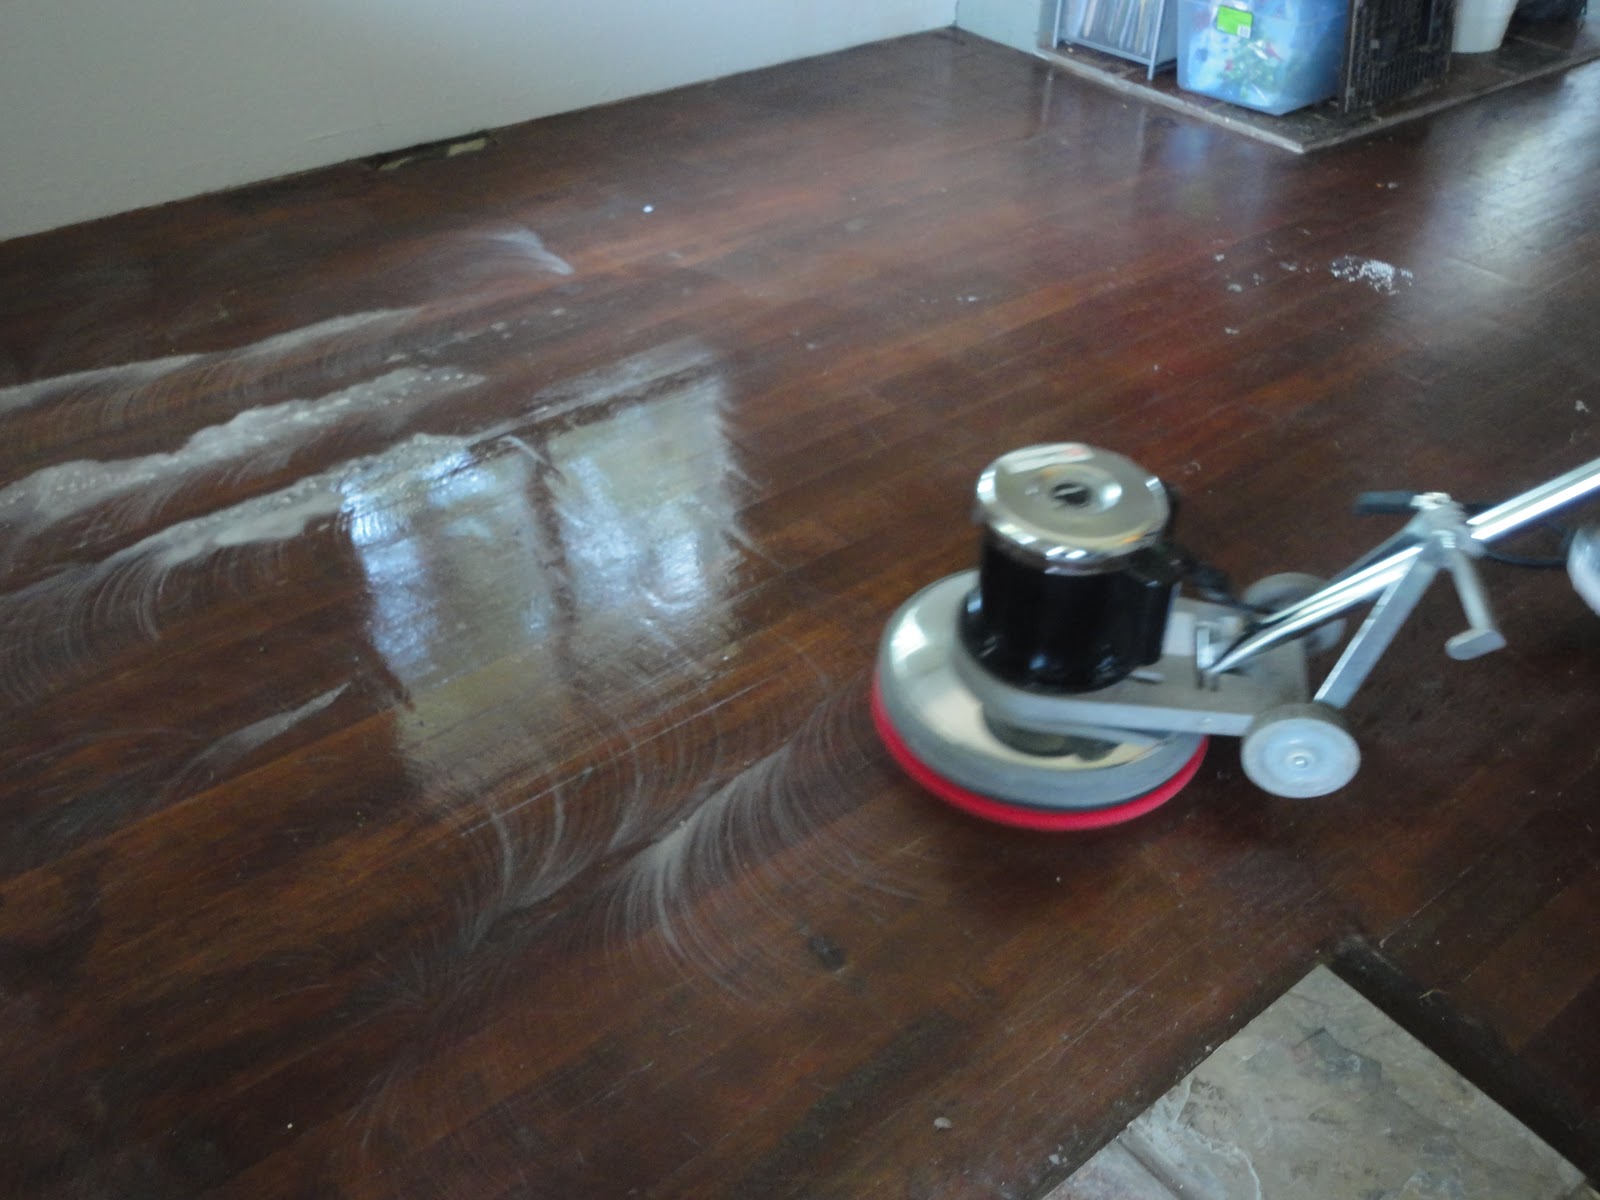
Sanding the floors down wasn't an option for us due to time constraints and allergies. So, we rented a professional floor cleaner from Home Depot (which was surprisingly affordable) and used a solution of water, Murphy Oil Soap, and a little Bon Ami as our cleaning agent. Once the water had time to sit a bit, the wax came off pretty easily. We purchased the red scrubby pad you see there. Evidently, different colors correspond to different "grits" and frankly, I wish we'd used a bit tougher one. But, better to err on the side of caution than wind up with scratches.
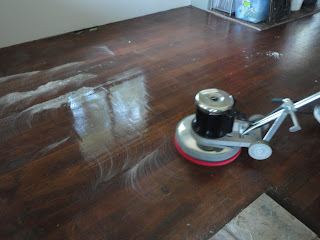
A good cleaning worked absolute wonders...you can already tell how much better the floors looked after just a few passes with the machine. Once they were fully scrubbed, there were quite a few areas where most of the original varnish was worn off. Which I am fairly sure is the only reason we got away with this next step:
After letting the floors thoroughly dry, we applied a coat of Daly's Walnut Stain to floor, using lint free cloths to give the finish a hand rubbed look.

We allowed the stain to dry overnight, than applied Daly's CrystalFin in semigloss. We used a large mop-head like applicator sponge to apply it, making sure to keep a wet edge:
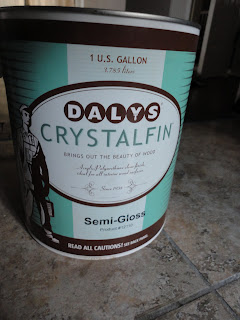
We bought these products at our local Benjamin Moore. They're made in Seattle and are much less toxic than a lot of what is commercially available. They aren't the cheapest, but avoiding chemicals that may or may not cause cancer is worth it to me. Plus, you can really smell the linseed in their products, which I think is cool. Yes, I'm odd.
Here's what we got:

So much prettier than what we started with and not bad for a weekends' worth of work. Want to see what the house looked like after we moved all the furniture out of the area? We put the dining table, china hutch, mand a few other construction sundries in the kitchen:

Stacked miscellaneous crap in front of the fireplace, since it has a slate hearth:

Put both couches and media table in our master bedroom:

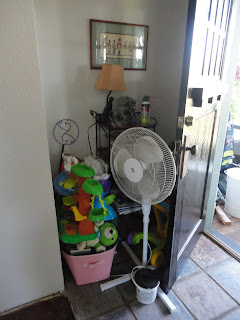
And even stuck some of the kids' toys in the entry way:
The good news is that after wading through so much stacked stuff, I got off my butt and took three very full boxes to Goodwill this afternoon. We almost have our house back to normal, too. In the end, it was so worth the mess.
Another before:
And after:
I'm not saying that this is the right way to do this, it was simply a last ditch effort that payed of surprisingly well. YMMV.
You can tell that hardwoods were in pretty miserable shape:

Sanding the floors down wasn't an option for us due to time constraints and allergies. So, we rented a professional floor cleaner from Home Depot (which was surprisingly affordable) and used a solution of water, Murphy Oil Soap, and a little Bon Ami as our cleaning agent. Once the water had time to sit a bit, the wax came off pretty easily. We purchased the red scrubby pad you see there. Evidently, different colors correspond to different "grits" and frankly, I wish we'd used a bit tougher one. But, better to err on the side of caution than wind up with scratches.
A good cleaning worked absolute wonders...you can already tell how much better the floors looked after just a few passes with the machine. Once they were fully scrubbed, there were quite a few areas where most of the original varnish was worn off. Which I am fairly sure is the only reason we got away with this next step:
After letting the floors thoroughly dry, we applied a coat of Daly's Walnut Stain to floor, using lint free cloths to give the finish a hand rubbed look.

We allowed the stain to dry overnight, than applied Daly's CrystalFin in semigloss. We used a large mop-head like applicator sponge to apply it, making sure to keep a wet edge:

We bought these products at our local Benjamin Moore. They're made in Seattle and are much less toxic than a lot of what is commercially available. They aren't the cheapest, but avoiding chemicals that may or may not cause cancer is worth it to me. Plus, you can really smell the linseed in their products, which I think is cool. Yes, I'm odd.
Here's what we got:

So much prettier than what we started with and not bad for a weekends' worth of work. Want to see what the house looked like after we moved all the furniture out of the area? We put the dining table, china hutch, mand a few other construction sundries in the kitchen:

Stacked miscellaneous crap in front of the fireplace, since it has a slate hearth:

Put both couches and media table in our master bedroom:

And even stuck some of the kids' toys in the entry way:

The good news is that after wading through so much stacked stuff, I got off my butt and took three very full boxes to Goodwill this afternoon. We almost have our house back to normal, too. In the end, it was so worth the mess.
Another before:
And after:
Thursday, July 12, 2012
Best of Pinterest- My Top Ten Pins
Without further ado...10 pins that made me smile or want to take it home with me:
Hipster French Bulldog
I want the husband to paint this...it could live in the kitchen, or even the kiddos' room.

Molding as attractive and cheap closet organization:


A very fun and girly riff on Union Jack:


Brilliant- actually washing the clothes where they wind up. Hopefully this becomes standard in homes someday!

With everything we've got going on right now, this looks like Heaven....just enough grass for the dogs:

Eventually going to try to find a way to weatherproof this idea- wouldn't it look awesome hanging on a covered porch?

Coral and Taupe:

And a very random, possible Halloween costume for Ms. Toddler and Mr. Baby:

Happy Thursday!
Molding as attractive and cheap closet organization:
A very fun and girly riff on Union Jack:
Source: sheridanfrench.blogspot.com
If we ever have a dedicated guest room again, I plan to make this bed
platform. I love that something made from pallets and dressed in a
hodgepodge of linens can look so amazing. I also want those white
floors! If we were in our "forever" house, I'd have our hardwoods
painted in an instant.
Brilliant- actually washing the clothes where they wind up. Hopefully this becomes standard in homes someday!
With everything we've got going on right now, this looks like Heaven....just enough grass for the dogs:
Eventually going to try to find a way to weatherproof this idea- wouldn't it look awesome hanging on a covered porch?
Coral and Taupe:
And a very random, possible Halloween costume for Ms. Toddler and Mr. Baby:
Happy Thursday!
Wednesday, July 4, 2012
(Almost) Free Art and Mantel Decor
Awhile ago, I shared a really great site for free art printables. It's no secret I've never gotten our mantel looking just right, but that is all about to change. I found some great sea life art on NYPL's site. You can click here to see the images- I chose 6 of my favorites, planning to make a 2x3 collage over the mantel. Here's my favorite of the bunch:
 You can tell they're images from a book. At the top of each image is a print button-I clicked that, then right clicked the image to save to my desktop. From there, I imported each image into Picasa. It's free and you can get it here if you need photo editing capabilities.
I cropped out the really dark edges-didn't want to waste all that ink!!!! From there: click "File," then "Print." Choose "Full Page" and click the print button on the lower right side, under the image.
You can tell they're images from a book. At the top of each image is a print button-I clicked that, then right clicked the image to save to my desktop. From there, I imported each image into Picasa. It's free and you can get it here if you need photo editing capabilities.
I cropped out the really dark edges-didn't want to waste all that ink!!!! From there: click "File," then "Print." Choose "Full Page" and click the print button on the lower right side, under the image.
With all 6 images printed, the only thing left was to find 6 inexpensive frames for them. A quick trip to Dollar Tree fixed that. I just got plain old document frames with hangers on the back.

If you look closely, you can actually see my reflection in the frame. Not the best, sorry. We're re-doing the flooring in the kitchen and I just had a couple of seconds before I needed to get back to it. I had originally planned to arrange my art over the mantel in a 2x3 collage, but decided to experiment with staggering them as well. We ultimately settled on a configuration that required 7 pieces, so I printed out another sheet and bought one more frame from the dollar store. We scored a raku-style ceramic vase from Target for about 5 bucks, marked down from 17.99:

And yet again, the picture quality sucks, but I want you to know that I'm not fudging the cost...it's one thing to say that something was "inexpensive" but that can mean different things to different people!
Then, we added a couple of candle sticks to complete the look, and there you have it. I tried to keep everything "centered" since we have a ridiculously long mantel. i was hopeful that I could visually shorten it up. I love how the sea life art turned out- the husband declared it Pottery Barn-esque- and best of all I'm only into the mantel decor about 13 bucks, so I'm not exactly locked into it.

I love that the reddish brown in the shells compliment our uber-cheap curtains...

Here's the 5 buck vase-love!- and some coral I got from my dad a million years ago...he used to be a professional diver and I'veswiped borrowed some really cool ocean-findings from him over the years.


There was no eliminating all of the glare on the frames in our *lovely* hazy weather, but I hope the pics are good enough to give you the gist- enjoy!

If you look closely, you can actually see my reflection in the frame. Not the best, sorry. We're re-doing the flooring in the kitchen and I just had a couple of seconds before I needed to get back to it. I had originally planned to arrange my art over the mantel in a 2x3 collage, but decided to experiment with staggering them as well. We ultimately settled on a configuration that required 7 pieces, so I printed out another sheet and bought one more frame from the dollar store. We scored a raku-style ceramic vase from Target for about 5 bucks, marked down from 17.99:

And yet again, the picture quality sucks, but I want you to know that I'm not fudging the cost...it's one thing to say that something was "inexpensive" but that can mean different things to different people!
Then, we added a couple of candle sticks to complete the look, and there you have it. I tried to keep everything "centered" since we have a ridiculously long mantel. i was hopeful that I could visually shorten it up. I love how the sea life art turned out- the husband declared it Pottery Barn-esque- and best of all I'm only into the mantel decor about 13 bucks, so I'm not exactly locked into it.

I love that the reddish brown in the shells compliment our uber-cheap curtains...

Here's the 5 buck vase-love!- and some coral I got from my dad a million years ago...he used to be a professional diver and I've
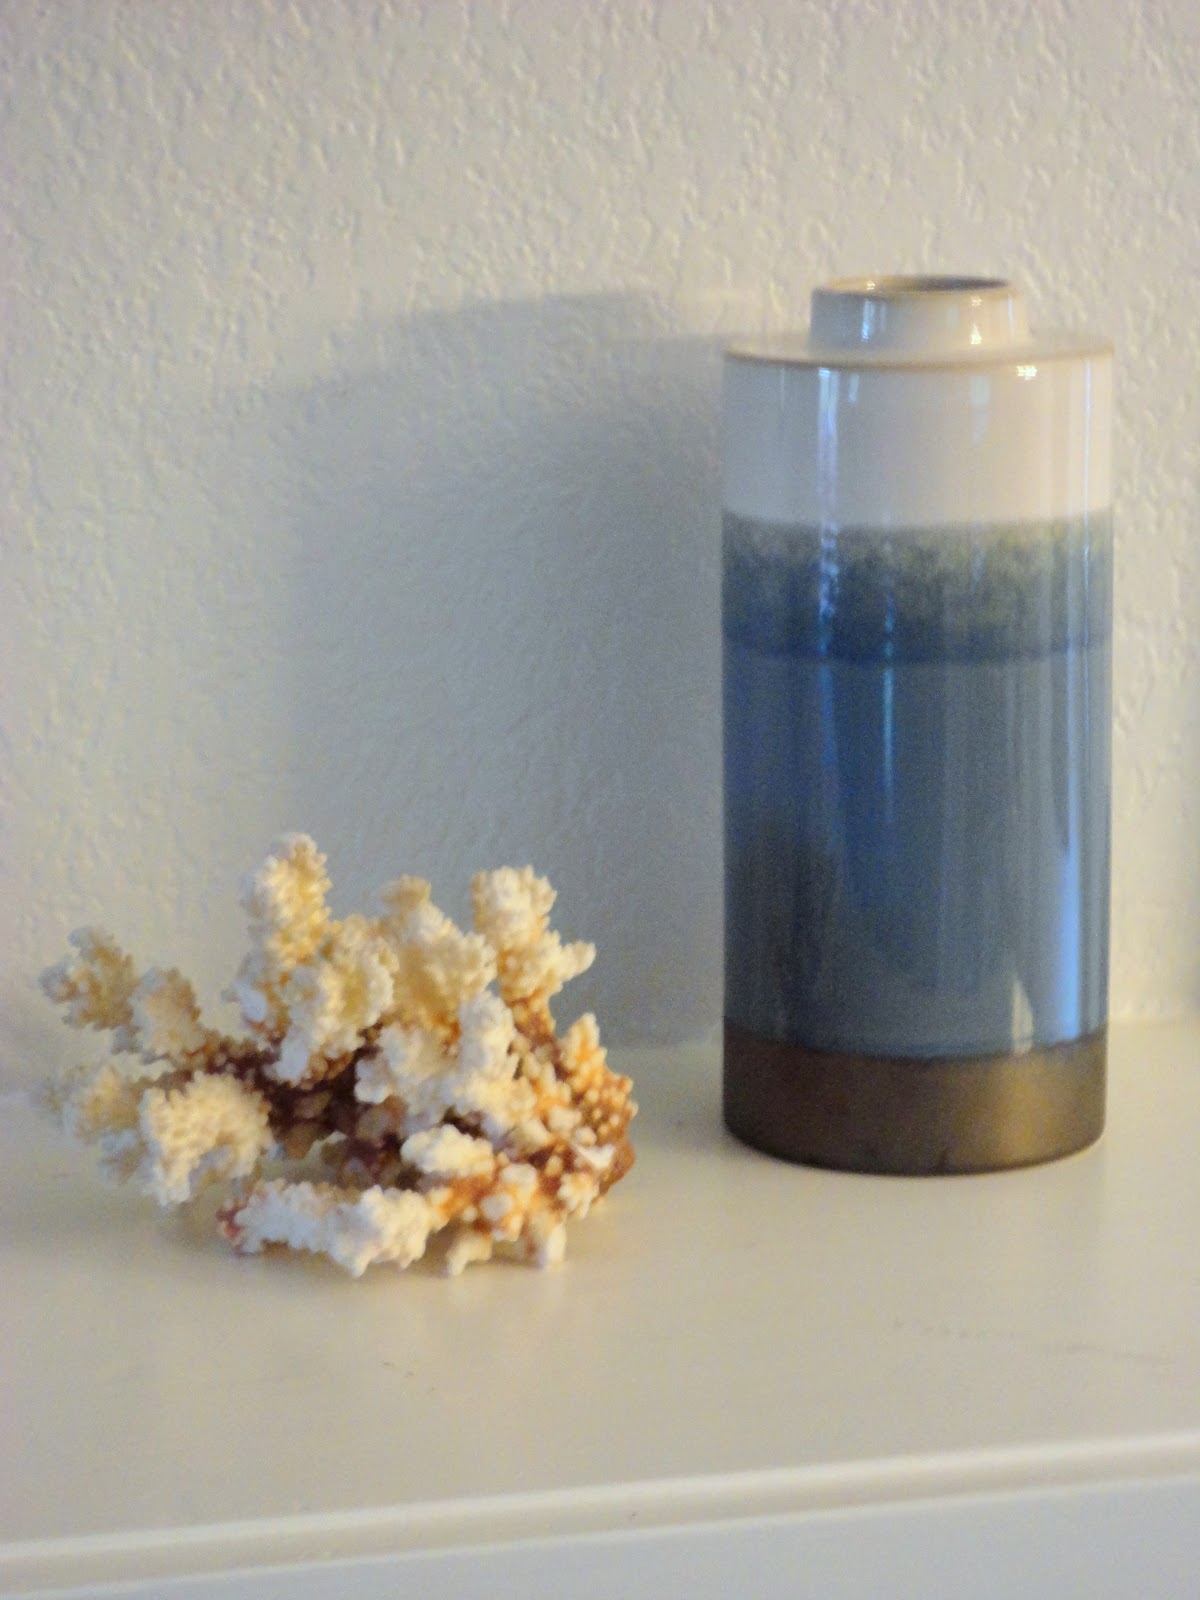

There was no eliminating all of the glare on the frames in our *lovely* hazy weather, but I hope the pics are good enough to give you the gist- enjoy!
Monday, July 2, 2012
Summer Mantel Decor
With our own mantel decor revamp underway for summer, I thought I'd share some of the mantels that inspired me to make a change. Maybe it's the fact that we've lived in a state with minimal sunshine for several years, but I am really loving the bright whites lately...and the less cluttered, the better. The older I get, the less stuff I want to have to deal with!
Minimal and perfect:

I'd probably choose a painting that had a bit more color to it, but it would be easy and inexpensive to recreate this mossy/beachy look:


Minimal and perfect:
I'd probably choose a painting that had a bit more color to it, but it would be easy and inexpensive to recreate this mossy/beachy look:
Source: simplifiedbee.blogspot.com via Erin on Pinterest
I absolutely love this...so simple and traditional, but if you look closely, there is a bright yellow Buddha perched to the right of the mirror. I would have never thought of stacking hardcover books inside of a fireplace, but they've pulled it off beautifully:
I absolutely love this...so simple and traditional, but if you look closely, there is a bright yellow Buddha perched to the right of the mirror. I would have never thought of stacking hardcover books inside of a fireplace, but they've pulled it off beautifully:
Source: apartmenttherapy.com via Sarah on Pinterest
Do you see the blue swirl vases to the right? You can read Centsational Girl's tutorial for those here
Can't wait to try it with some of the old glassware we have laying around!
Do you see the blue swirl vases to the right? You can read Centsational Girl's tutorial for those here
Can't wait to try it with some of the old glassware we have laying around!
Source: centsationalgirl.com via Rebecca on Pinterest
We should have pics of our own mantel to show off soon. And the best part? It cost us less than 15 bucks!
We should have pics of our own mantel to show off soon. And the best part? It cost us less than 15 bucks!
Subscribe to:
Posts (Atom)